Upside-Down Guide to Home Efficiency
Upside Down Retrofitting Energy Efficiency, driving down your heating and cooling energy costs systematically.
You don’t have to turn your house upside down to bring energy cost down! This upside-down pyramid provides a structured approach to increase energy efficiency. The most important thing to remember is that each step should be carried out in the correct order (1-9) to gain the maximum benefit. The first step is relatively easy, but very cost effective. As you go down the steps, the cost and difficulty of the retrofit increase.
Step 1:

Begin by sealing gaps around window and door architraves. Caulk the skirting boards to the floor and block any old wall vents with plaster or closed cell foam backing rod. Inside cupboards in the kitchen, laundry, and bathroom, seal around plumbing penetrations. Don’t forget to check behind appliances like the fridge, dishwasher, and oven for hidden gaps. If you have ducted heating, find the return grill, take it off the wall and inspect and seal the cavity behind it. In areas, you can reach, inspect the insulation for gaps and compression (under the floor, in the ceiling space.) Insulation works best with continuous coverage.
Step 2:
 Draught-proof your bathroom, toilet, and kitchen exhaust fans by adding flaps or dampers and ensuring they are ducted outside. At the same time, add supply air vents to help fans work efficiently. Upgrade all door and window seals, and make sure external doors are fitted with appropriate draught stoppers. Quality sealing products can be sourced from Tighthouse.
Step 3:
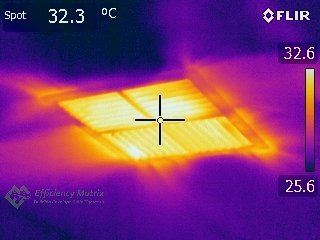
In winter, cover evaporative cooling vents, as they act like chimneys and allow warm air to escape your home. For better long-term performance, consider removing the evaporative cooler altogether and installing inverter split systems to provide efficient, targeted cooling.
Step 4: 
Replace old box (wall) air conditioners with split systems, which are far more efficient. When these new systems are installed, ensure all wall and ceiling penetrations are properly sealed to maintain airtightness.
Step 5:
From the attic space, use expandable foam to seal off internal wall cavities, paying particular attention to cavity sliding door pockets. These internal walls can leak significant amounts of air if not properly sealed.
Step 6:
Have a professional installer apply spray polyurethane foam under timber floors. This helps both insulate and seal the area effectively. Make sure the installer also covers the lower portions of external walls to stop insulation from sagging or falling over time.
Step 7:
Engage a specialist to insulate existing external walls with loose-fill insulation. This method is effective and minimally invasive.
Step 8:
 Once your home becomes more airtight, you’ll need to maintain healthy indoor air quality. Install a whole-house mechanical ventilation system such as an Energy Recovery Ventilator (ERV). These systems help filter dust and pollen, regulate indoor CO₂ levels, and recover heat or coolness from outgoing air to pre-condition the incoming fresh air.
Step 9:
Finish by installing double or triple-glazed windows with key performance features. Aim for a gap of 10 to 14 millimetres between panes, use non-metallic spacers to avoid thermal bridging, and choose window frames made from timber or thermally broken aluminium. Low-E glass is a worthwhile upgrade if budget allows. After installation, seal around the architraves to maintain airtightness.
Undertaking all 9 steps will result in the ultimate energy efficient house, but rest assure that each step will bring with it some tangible benefits including lower energy bills!


